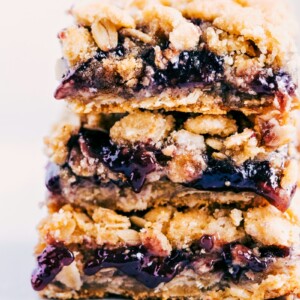
These buttery Oatmeal Jam Bars are easy to make and a hit wherever they’re served. Sweet, fruity jam goes between two layers of buttery oatmeal cookie dough!
Use extra jam in these Costco Raspberry Crumble Cookies or these Raspberry Bars.


author’s note
Cookie Crust + Jam Center = Dessert Goals!
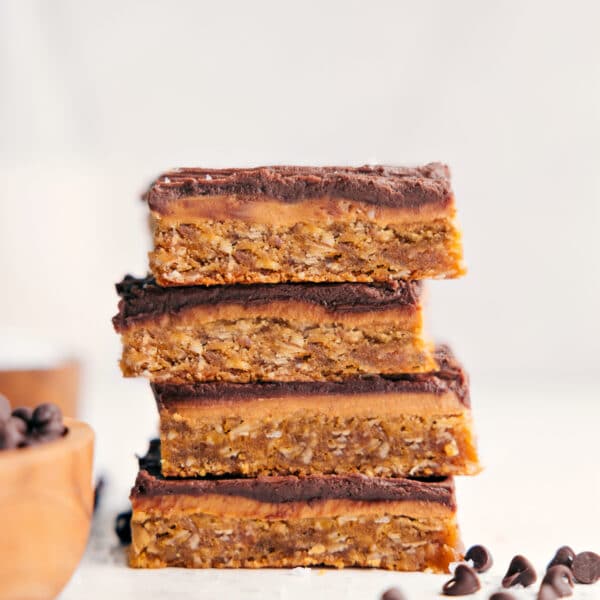
If you’ve ever tried these practically famous Carmelitas, you know the magic of oatmeal cookie bars. Sandwiching a filling in the center takes them to a whole new level.
Instead of loading the center with caramel and chocolate (like in Carmelitas), I’m adding a thick layer of jam.
I’m usually more of a chocolate girl (hello, Chocolate Cake!), while my husband is all about fruity desserts. But these oatmeal jam bars? They’re something we both agree on when we want a sweet treat—absolutely delicious!


Ingredients In Oatmeal Jam Bars
- Butter: Cool the melted butter to room temp before using to avoid greasy bars.
- Brown Sugar: Lightly pack these into the cup for an accurate measurement.
- Old-Fashioned Oats: Be sure to use old-fashioned oats, not quick oats.
- Salt and Baking Soda: Make sure your baking soda is fresh.
- Seedless Blackberry Jam: Any jam flavor will work! For a smoother filling, use seedless jam. But if seeds don’t bother you, feel free to use jam with seeds.
Featured Comment
“These are delicious and easy to make. I like how easy it is to change up the flavors with different jams, nuts, etc. Everyone loves them. Thanks for another great recipe.”
– April
How To Make Oatmeal Jam Bars
- Preheat and Prep: Warm your oven. Use parchment paper for easy bar removal.
- Combine Wet Ingredients: Cool melted butter to avoid greasy bars, then mix with brown sugar and vanilla until smooth.
- Mix in Dry Ingredients: Add flour, oats (choose old-fashioned for texture), salt, and baking soda to create a dough.
- Bake Base: Press more than half of the dough into the pan. Bake briefly for 8 minutes.
- Add Jam: Spread your jam on top, avoiding the edges to prevent burning.
- Top and Bake: Sprinkle the rest of the dough over the jam. Bake until golden, about 13-18 minutes.

Oatmeal Jam Bar Tips
- Pan size: Use an 8×8-inch pan. A 9×9 makes the bars too thin. Doubling in a 9×13 should work, but I haven’t tested it.
- Line the pan: Use parchment with overhang for easy removal.
- Mix well: Stir melted butter & brown sugar until smooth to avoid greasy bars.
- Jam layer: Spread jam gently, leaving a border to prevent burning.
- Bake time: Don’t overbake! Bars are done when edges are golden & the top looks set.
Storage
Oatmeal Jam Bar Storage
- These bars are best eaten within 1-2 days of being made. The longer they sit, the more the jam will soften the bottom layer, making it gooey.
- Store bars in an air-tight container at room temperature.
- I have not personally tried freezing and thawing these bars, but I suspect they would get a bit soft and gooey on the bottom as they thaw.
More Easy Dessert Recipes:
Desserts
Cinnamon Roll Cheesecakes
Desserts
7 Layer Bars Recipe
Desserts
Cookies and Cream Muddy Buddies
Desserts
S’mores Cookie Bars
Oatmeal Jam Bars
Video
Equipment
Ingredients
- 10 tablespoons unsalted butter melted and cooled to room temperature
- 2/3 cup light brown sugar lightly packed, don’t press it in
- 1 teaspoon vanilla extract
- 1 cup all-purpose flour
- 1 cup old-fashioned oats not quick oats
- heaping 1/4 teaspoon salt
- 3/4 teaspoon baking soda
- 3/4 cup seedless blackberry jam or any flavor you’d like!
Instructions
- Preheat oven to 350°F. Line an 8×8-inch pan with parchment paper (I don’t recommend foil), leaving an overhang for easy removal. Melt the butter and let it cool slightly to avoid greasy bars.
- Whisk melted (cooled) butter, brown sugar, and vanilla until fully integrated; it will seem like they won’t, keep whisking until completely integrated.
- Combine flour, oats, salt, and baking soda into a thick dough using a wooden spoon or spatula. Press just over half into the pan in an even layer. Bake for 8 minutes and remove.
- Spread jam over the base, avoiding the edges to prevent burning. Gently layer without pressing into the base. Sprinkle remaining oat mixture on top without pressing down.
- Continue baking for 13–18 minutes until the top is lightly golden. Cool at room temperature on a wire rack for at least 2 hours before cutting; they firm up as they cool (see note 1).
Recipe Notes
Nutrition
Nutrition information is automatically calculated, so should only be used as an approximation.


These are sooo good! Halved the recipe and used strawberry jam and white sugar (what I had on hand). Hubby gobbled them up fast, I was lucky to grab one before he finished them all!
I am so happy to hear this! Thanks so much Annabell! 🙂
Great recipe. Tried it with unsweetened blueberry jam, and it was amazing! One recommendation based on my experience – don’t bother prebaking the base. Because the topping only cooked for an additional 8 minutes, it was undercooked, but the base was already done. In future, I will completely assemble both layers and jam, then bake the whole thing for 30 minutes.
Delish! I am so happy to hear this! Thanks for your tips! 🙂
So delicious! I was looking for an easy and fast dessert to whip up while making dinner and these were perfect. The whole family loved them. Thank you!
I am so thrilled to hear this! Thanks so much Jay! 🙂
I made this today with plum jam I canned this summer. My husband loved it! He said his mom used to make them.
Delish! I am so thrilled to hear this was a hit! 🙂
I’ve made theses several times and they are so delicious—buttery, slightly crumbly, and so good. I used seedless raspberry jam and they were super yummy with it. Every time I bring them to a gathering, people love them.
I am so thrilled to hear this! Thanks so much Julie! 🙂
Made these, but substituted blackberry jam for lingonberry jam and finished them with a drizzle of honey on top. They were divine.
Delish! So glad you enjoyed! Thanks for your comment Evan! 🙂
Where is the measurements I suppose we’re supposed to guess?
Not sure what you’re talking about. The recipe box shows all the measurements and directions, if you scrolled far enough to comment you scrolled past it
I made these with strawberry jam (blackberry would have been better) because that’s what I had! The oatmeal texture and flavor were awesome and the buttery flavor was a highlight! I had trouble spreading the jam and it was much easier after a quick zap in the microwave.
Thanks for sharing!
So glad you enjoyed! Thanks for your comment Megan! 🙂
These came out delicious. Mine came out super soft and fell apart. We let them cool don’t know why.
Glad you liked them! They are a bit crumbly until fully cooled through!
These are amazing. But I would not put a whole cup of jam in it. The first time I did and they did not hold their shape. Just remade them with half a cup, and they are perfect!